随着大型科技公司持续向生成式人工智能转型,亚马逊、微软等公司宣布在 2025 年进行新一轮裁员,旨在优化资源配置。
AI|L2和L3级自动驾驶有什么区别
L2和L3级自动驾驶有什么区别:
1. L2级别:你是“主驾驶”,它是“好助手”
- 通俗定义: 组合辅助驾驶。
- 状态: 你的手可以短暂离开(或者轻扶),但你的眼睛和大脑必须时刻盯着路况。
- 谁在开车: 本质上还是你在开车。车只是在帮你控制油门、刹车和方向盘(比如自动跟车、保持在车道中间)。
- 关键点: 如果前方突然出现个障碍物,车没识别出来,撞上了,责任全是你的。你不能玩手机,不能看电影。
- 目前市面情况: 特斯拉的AP、各种造车新势力的“领航辅助(NOA/NGP)”,绝大多数都属于L2(或者叫L2.5、L2.9)。
2. L3级别:它是“临时司机”,你是“监考官”
- 通俗定义: 有条件的自动驾驶。
- 状态: 在特定条件下(比如高速公路、堵车路段),你的眼睛和手可以离开路面。你可以刷短视频、发邮件,甚至吃个泡面。
- 谁在开车: 这个阶段,车才是司机。它承诺在这些特定情况下能搞定一切。
- 关键点: 如果在系统运行期间,车自己撞了,责任通常由汽车厂家承担。但是,你不能睡觉,因为当系统遇到搞不定的情况(比如修路、暴雨),它会疯狂尖叫提醒你,你必须在几秒钟内接管。
- 目前市面情况: 极少。奔驰、宝马的部分车型在德国等地区拿到了牌照,国内正在逐步开放试点。
四个维度的核心区别:
| 维度 | L2 级(辅助驾驶) | L3 级(自动驾驶) |
|---|---|---|
| 责任人 | 始终是你 | 系统负责(在它工作时) |
| 注意力 | 必须时刻盯着路 | 可以分心(看书、玩手机) |
| 双手 | 必须随时准备接管 | 可以脱离,但接到指令需接管 |
| 分水岭意义 | 人是主体,机器是工具 | 机器是主体,人是后备 |
总结:
- L2 就像是一个刚拿驾照的新手坐在驾驶位: 你坐在副驾驶,手得扶着方向盘,眼得盯着前方的坑,随时准备帮他踩刹车。他是帮你省力的,但你心里的弦得崩着。
- L3 就像是你雇了一个司机: 你可以坐在驾驶位上处理工作,不用看路。但这个司机比较胆小,他遇到解决不了的难题会大喊“老板快来拉一把”,这时候你得立刻扔掉手机接管。
一句话总结:L2是“省力不省心”,L3是“既省力又省心(但不能睡觉)”。
AI|Gemini CLI Tips & Tricks
This guide covers ~30 pro-tips for effectively using Gemini CLI for agentic coding
AI|Gemini CLI 实用技巧与窍门
本指南涵盖约30个有效使用 Gemini CLI 进行智能编码的专业技巧,包括使用 GEMINI.md 设置持久上下文、编写自定义命令、利用 MCP 服务器、多模态输入、自动化工作流等,学会这些技巧将极大地提高您的编码效率和生产力。
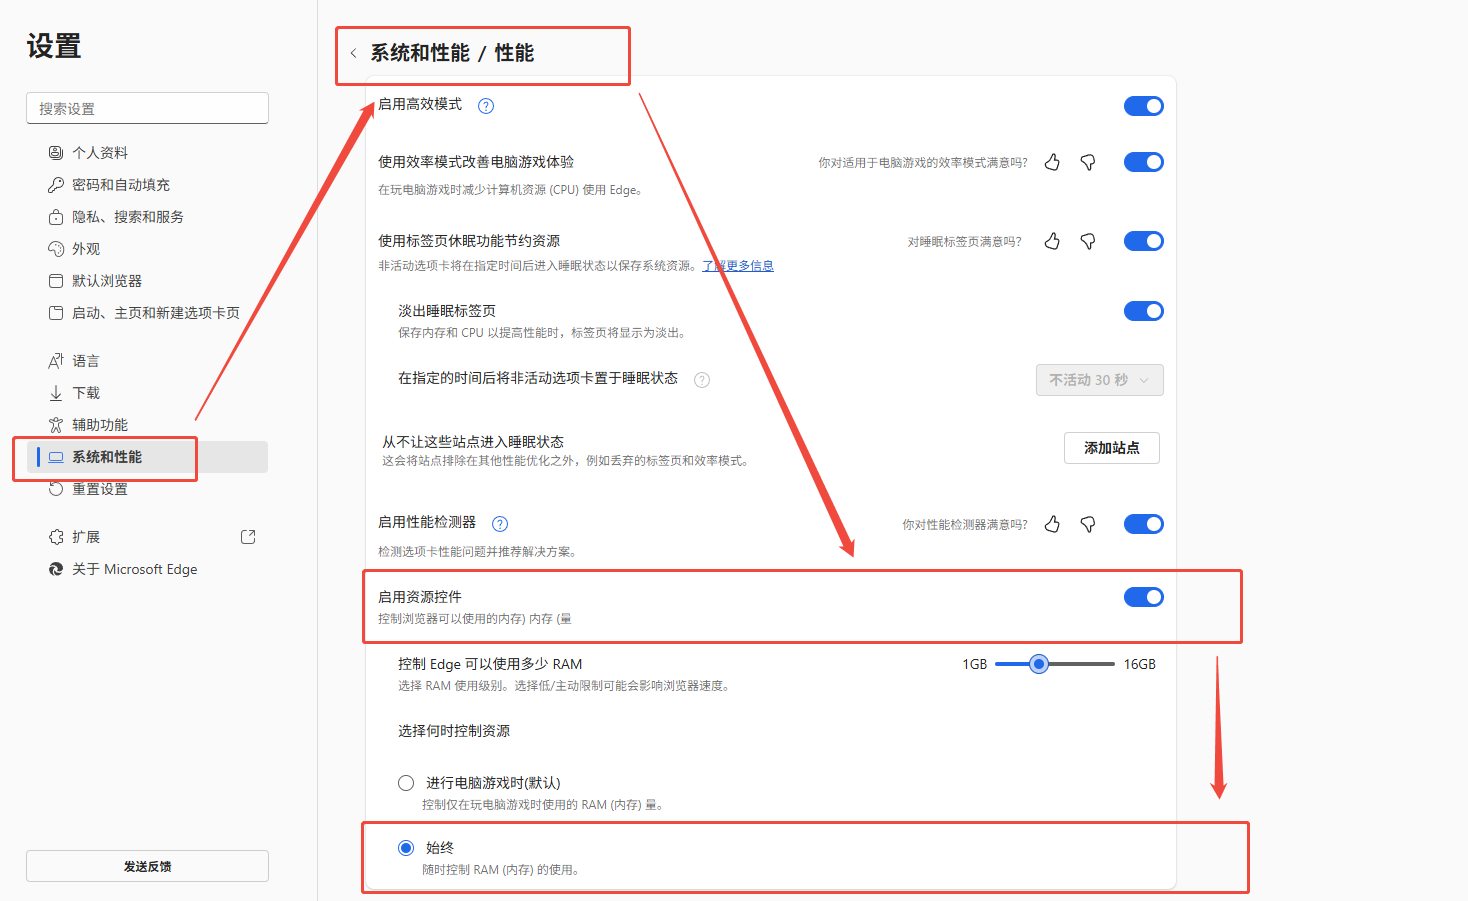
限制 Microsoft Edge 浏览器的内存占用
(Repost)4.3 Million Browsers Infected,Inside ShadyPanda's 7-Year Malware Campaign
ShadyPanda ran a seven-year browser-extension campaign that infected about 4.3 million Chrome and Edge users. The group published seemingly legitimate extensions—examples include Clean Master and WeTab—accumulating featured badges and millions of installs to gain user trust. Once widely deployed, they silently pushed malicious updates that transformed those extensions into backdoors and spyware: executing remote JavaScript, harvesting full browsing histories, keystrokes, cookies, and browser fingerprints, and exfiltrating data to attacker-controlled domains. The campaign highlights a systemic flaw in marketplace security:one-time submission reviews plus automatic updates allow trusted extensions to be weaponized after approval, requiring ongoing behavioral monitoring.
(译)430万浏览器被感染,揭秘 ShadyPanda 持续 7 年的恶意软件活动
名为 ShadyPanda 的组织策划并实施了长达七年的浏览器扩展恶意活动,感染了约 430 万用户。他们先发布合法插件(如 Clean Master、WeTab)以获取信任和“Featured/精选”推荐,积累数百万用户后通过静默更新将这些扩展武器化。这些扩展成为后门与间谍软件,窃取浏览历史、执行远程代码,暴露出应用商店“只在提交时审查”的系统性漏洞。
github Fine-grained personal access token 使用
本文字数: 1.3k 阅读时长 ≈ 1 分钟
如何使用 github Fine-grained personal access token 修改组织下仓库文件
必应搜索屏蔽垃圾网站
默认的必应搜索搜索代码相关的信息很多csdn的文章,质量不行,使用 -*.csdn.net过滤掉
默认
搜索coze,默认为:
国内版 https://cn.bing.com/search?q=coze
国际版 https://bing.com/search?q=coze
屏蔽后
国内版 https://cn.bing.com/search?q=coze%20-site:*.csdn.net
国际版 https://bing.com/search?q=coze%20-site:*.csdn.net
配置
使用 Infinity 插件的可以这样配置:

译|Linux 启动过程:从按下电源到内核
本文字数: 5.6k 阅读时长 ≈ 5 分钟
逐步走读 Linux 的启动过程:从按下电源到进入内核的第一行 C 代码,涵盖 CPU 复位、BIOS/UEFI、引导加载器、内核 setup 阶段与内存映射等关键环节。
